
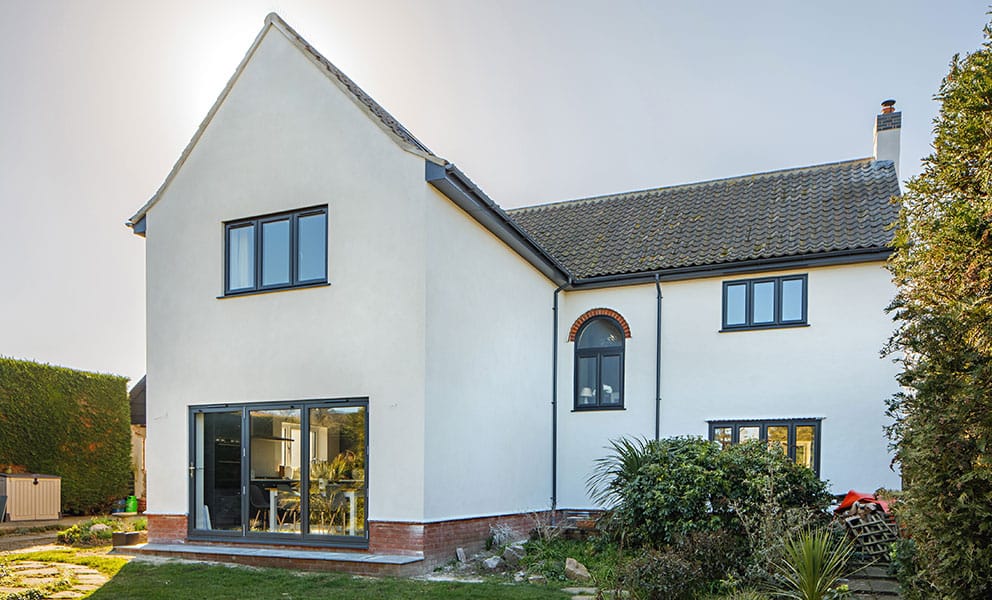
Picking the right render is important if you want to improve the look and durability of the outside of your house. Render not only protects your walls, but it also has a big impact on how your home looks. There are so many finishes on the market that it can be hard to choose the right one. A step-by-step guide, on the other hand, will help you feel confident as you make your choice and make sure that your home gets the perfect render.
Step 1: Assess Your Needs and Preferences
Before you start using renders, you should think about what you need and what you like.
Think about things like the style of your home’s architecture, the surroundings, and the look you want to achieve. Do you want to go for a classic or modern look? Would you like a smooth or textured finish? Figuring out what you need will help you cut down your choices and make a decision more quickly.
Step 2: Understand the Types of Renders
Renders come in various types, each with its unique properties and applications. The most common types include cement render, acrylic render, lime render, and polymer render. Cement render, made from a mixture of cement, sand, and lime, is known for its strength and versatility. Acrylic render, on the other hand, offers excellent adhesion and flexibility, making it suitable for diverse substrates. Lime render is valued for its breathability and aesthetic appeal, while polymer render combines the benefits of acrylic and cement renders, offering enhanced durability and water resistance. Familiarize yourself with the characteristics of each type to determine which one aligns best with your requirements.
Step 3: Consider the Substrate
The substrate, or the surface to which the render will be applied, plays a crucial role in determining the suitability of the render. Different substrates require different types of renders and preparation techniques. Common substrates include brick, concrete, blockwork, and fibre cement. While some renders are compatible with multiple substrates, others may require specific primers or preparation methods. Ensure that you assess the condition of the substrate and choose a render that is compatible with it to achieve optimal results.
Step 4: Evaluate Performance Characteristics
When selecting a render, consider its performance characteristics, such as durability, weather resistance, and maintenance requirements. Depending on your location and climate conditions, you may need a render that can withstand extreme temperatures, moisture, or salt exposure. Additionally, assess the long-term maintenance needs of the render, as some may require periodic recoating or repairs. Opting for a high-quality render with superior performance characteristics can help prolong the lifespan of your exterior walls and minimize maintenance efforts.
Step 5: Explore Colour and Texture Options
The colour and feel of the render can have a big effect on how your house looks generally. While traditional renders typically have a natural sand or cement colour, modern renders offer a wide range of colour options to suit your preferences. From classic whites and neutrals to bold and vibrant hues, the possibilities are endless. Similarly, you can choose from various textures, including smooth, textured, coarse, or patterned finishes, to add depth and visual interest to your walls. Experiment with different colour and texture samples to find the perfect combination that complements your home’s architecture and surroundings.
Step 6: Seek Professional Advice
If you’re unsure about which render is best suited for your home, don’t hesitate to seek professional advice. A skilled Zaks Render house rendering contractor can look at your home, talk to you about your needs, and suggest the best ways to render it. They can also give you useful information about things like how to apply, how to prepare the base, and how to keep it in good shape. If you work with a professional you can trust, you can be sure that your rendering job goes smoothly and produces great results.
Step 7: Request Samples and Testimonials
Before making a final choice, ask for samples of the render choices you’re interested in and read reviews from past clients. You can get a better sense of the colour, texture, and quality of the finish by looking at real render samples.
Reading comments and reviews from other homeowners who have used the same render can also tell you a lot about how well it works and how happy customers are with it. Do some study and ask people what they think so you can make a decision that meets your needs.
WonderWorks Orlando Offering a Variety of Educational Programs(Opens in a new browser tab)
Step 8: Plan Your Budget
Lastly, consider your budgetary constraints when selecting a render for your home. The cost of rendering can vary depending on factors such as the type of render, the size of the project, and any additional preparatory work required. Obtain quotes from multiple rendering contractors and compare the costs against the quality and benefits offered by each option. While it may be tempting to opt for the cheapest option, remember that quality should not be compromised when it comes to protecting and enhancing your home’s exterior.
Finally, picking the right finish for your house needs some careful thought and planning. With this step-by-step help, you can feel confident as you go through the selection process and pick the finish that best fits your needs and tastes. Investing in high-quality renderings can change the outside of your home and make it look better for years to come, whether you’re after sturdiness, looks, or both.