
Grease traps, also known as grease interceptors, are essential for preventing fats, oils, and grease from entering and clogging plumbing systems. Proper installation of a grease trap is crucial for ensuring it functions efficiently and complies with local regulations. This article provides a comprehensive guide to grease trap installation, including step-by-step instructions, best practices, and maintenance tips.
Understanding Grease Traps
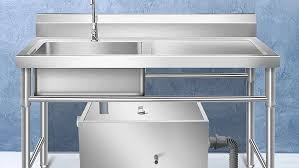
Before diving into the installation process, it’s important to understand the role of grease traps. These devices intercept FOG from wastewater, allowing only water to pass through while trapping grease and solids. This prevents blockages in plumbing systems and reduces the risk of environmental contamination. Grease traps installation are commonly used in commercial kitchens, restaurants, and food processing facilities.
Step-by-Step Instructions for Grease Trap Installation
Step 1: Assess Your Needs
Determine the Size and Type: Calculate the required size of the grease trap based on the volume of wastewater and the nature of the establishment. Use local regulations and manufacturer guidelines to choose the appropriate size and type (e.g., passive or automatic).
Select the Location: Choose a location that is easily accessible for maintenance and cleaning. The grease trap should be installed as close to the source of wastewater as possible to prevent FOG from solidifying before reaching the trap.
Step 2: Prepare for Installation
Gather Materials and Tools: Ensure you have all necessary materials, including the grease trap unit, pipes, fittings, gaskets, and sealants. Tools may include wrenches, pipe cutters, and levels.
Check Local Regulations: Review local plumbing codes and health department regulations to ensure compliance. Obtain any required permits before starting the installation.
Step 3: Install the Grease Trap
Shut Off Water Supply: Turn off the water supply to the area where the grease trap will be installed to prevent any accidental spills or leaks.
Excavate (if necessary): For outdoor installations, excavate the area where the grease trap will be placed. Ensure the hole is deep enough to accommodate the trap and allow for proper drainage.
Position the Grease Trap: Place the grease trap in the designated location. Ensure it is level and stable to prevent any operational issues.
Connect Inlet and Outlet Pipes: Attach the inlet pipe to the inlet side of the grease trap. This pipe carries wastewater from the kitchen drains to the trap. Connect the outlet pipe to the outlet side, which will carry treated water to the sewer system.
Seal Connections: Use appropriate gaskets and sealants to secure all connections. Ensure there are no leaks, as even small leaks can lead to significant problems over time.
Install Vent Pipe: Install a vent pipe to prevent the buildup of gases inside the grease trap. This is typically connected to the outlet side of the trap.
Step 4: Test the Installation
Restore Water Supply: Turn the water supply back on and run water through the system to check for leaks and ensure proper flow.
Inspect for Leaks: Carefully inspect all connections and seals for any signs of leakage. Tighten or reseal as necessary.
Check Functionality: Monitor the grease trap to ensure it is intercepting grease and allowing water to pass through as intended.
Best Practices for Grease Trap Installation
Regular Maintenance: Schedule regular maintenance to clean and inspect the grease trap. This includes removing accumulated grease and solids to prevent blockages and ensure optimal performance.
Training Staff: Educate kitchen staff on proper disposal practices to minimize the amount of grease and solids entering the drain. Avoid pouring oils and food scraps directly into sinks.
Monitor Performance: Keep a log of maintenance activities and monitor the performance of the grease trap. This helps in identifying any potential issues early and ensures compliance with local regulations.
Use Appropriate Cleaning Products: Avoid using harsh chemicals or detergents that can break down grease and allow it to pass through the trap. Use products specifically designed for grease traps if needed.
Professional Inspection: Have the grease trap inspected by a professional plumber periodically to ensure it is functioning correctly and to address any potential issues.
Choosing the Best Hot Water Systems in Australia in 2023(Opens in a new browser tab)
Conclusion
Proper grease trap installation is crucial for maintaining an efficient and compliant plumbing system in any establishment that handles FOG. By following the step-by-step instructions and best practices outlined in this guide, you can ensure your grease trap operates effectively,preventing costly blockages and environmental damage. Regular maintenance and adherence to local regulations will further enhance the longevity and performance of your grease trap, safeguarding your business and the environment.