

Are you looking to know how to backup your iPhone on a Mac? Look no more than the comprehensive guide of ScreenFixed. Backing up your iPhone is an essential task that every iPhone user should prioritize. It involves creating a copy of all your essential data, such as contacts, messages, photos, and apps, and storing it in a secure location.
This ensures that even if your iPhone gets lost, stolen, or damaged, you can quickly restore your data to a new device. Let’s grab your iPhone and your Mac, and let’s embark on this essential journey to safeguard your digital world.
Why is iPhone Backup Important?
The importance of backing up your iPhone cannot be overstated. Your iPhone contains a wealth of personal and valuable information that you wouldn’t want to lose. Imagine losing all your contacts, precious photos, important messages, and app data in an instant. Recovering this data can be a daunting and sometimes impossible task without a backup.
Backing up your iPhone protects you from potential risks such as hardware failure, software glitches, accidental deletion, or even theft. These unforeseen events can happen at any time and have a backup. This ensures that you can quickly restore your data and get back to normalcy without losing any critical information.

Preparing Your iPhone for Backup
There are a few steps you should take to ensure that your iPhone is ready before starting the backup process:
Step 1:
Make sure that your iPhone is charged or connected to a power source. Backing up your iPhone can take some time. You don’t want it to run out of battery in the middle of the process.
Step 2:
Check if your iPhone is running the latest software version. Updating your iPhone’s software not only ensures that you have the latest features and security patches but also helps in creating a smooth backup process.
To update your iPhone’s software, go to Settings > General > Software Update and follow the prompts.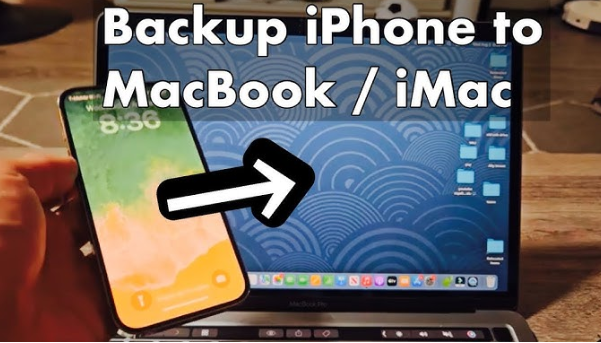
Connecting Your iPhone to Your Mac
You need to connect your iPhone to your computer using a reliable USB cable to back up your iPhone on a Mac. Make sure to use the cable that came with your iPhone or a certified third-party line to ensure a stable connection. Connect one end of the line to your iPhone and the other end to an available USB port on your Mac.
Launching iTunes on Your Mac
Once your iPhone is connected to your Mac, you need to launch iTunes. If you don’t have iTunes installed on your Mac, you can download it from the Apple website. After installing iTunes, open the application by clicking on the iTunes icon in your Applications folder or by searching for it in Spotlight.
It’s important to note that you should always have the latest version of iTunes installed on your Mac to ensure compatibility and access to the latest features. To check for updates, go to the iTunes menu and select “Check for Updates.”
Selecting Your iPhone in iTunes
You will see your iPhone icon appear in the top left corner of the iTunes window after launching it. Click on the iPhone icon to select your device. If iTunes does not recognize your iPhone, then make sure that it is properly connected to your Mac and try restarting both your iPhone and Mac.
Choosing Backup Options
Once you have selected your iPhone in iTunes, you will be presented with various options for backing up your device. These options include backing up your iPhone to iCloud or backing up your iPhone to your computer. Select the “This computer” option to back up your iPhone on your Mac.

You can also choose whether to encrypt your backup or not. Encrypting your backup adds an extra layer of security by protecting your data with a password. This is especially important if you have sensitive information stored on your iPhone. Check the “Encrypt iPhone backup” box and enter a password to encrypt your backup.
Initiating the Backup Process
You can initiate the backup process by clicking on the “Back Up Now” button. iTunes will start creating a backup of your iPhone, which may take some time, depending on the amount of data on your device. It’s important to note that you should not disconnect your iPhone from your Mac during the backup process to avoid any interruptions.
Monitoring the Backup Progress
While the backup is in progress, you can monitor its progress in the iTunes window. A progress bar will appear at the top of the iTunes window, which indicates how much of the backup has been completed. You can also check the estimated time remaining for the backup to complete.
It’s essential to be patient during the backup process and not interrupt it. If you need to use your Mac for other tasks, then you can minimize the iTunes window and continue working while the backup runs in the background.
Verifying Your iPhone Backup on Mac
It’s a good idea to verify that your iPhone backup was successful. To do this, go to iTunes Preferences and click on the “Devices” tab. You should see your iPhone backup listed with the date and time it was created. This confirms that your data has been successfully backed up and is ready for restoration.
Conclusion
We explored how backing up your iPhone on a Mac using iTunes is a simple and essential task that every iPhone user should regularly perform. It ensures that your valuable data is protected and easily recoverable in case of any unforeseen events.
You can quickly back up your iPhone by following the step-by-step guide outlined above and have peace of mind knowing that your data is safe. Remember to backup your iPhone regularly to avoid any potential data loss.
How To Maximize Your Productivity When Working From Home(Opens in a new browser tab)
Discover how to back up an iPhone on a Mac effortlessly at ScreenFixed! Our expert technicians are ready to assist you with seamless data protection solutions. Don’t risk losing your valuable data – visit ScreenFixed today and ensure your iPhone is safely backed up.