

All iTunes tracks bought before 2009 and Apple Music songs have strict DRM protection. Although an Apple Music premium subscription lets you download and listen to songs offline, you can only do so on an Apple device. Many users are frustrated by these limitations and wonder how to remove DRM from Apple Music. If you want to do more with your Apple Music tracks, play on any platform, share with friends, or edit as you wish, this article will help you. We’ll show you three ways to bypass Apple Music DRM protections, including the most effective, which is using an audio converter. Read on for all the details.
Method 1: Remove DRM from Apple Music via Audio Converter
The number one method of how to remove DRM from Apple Music is with an audio converter. The most reliable audio converter we recommend is the MuConvert Apple Music Converter. This powerful DRM removal tool, which works on Windows and Mac, comes integrated with the Apple Music web player so you can download all your favorite Apple tracks and keep them forever without an active Apple Music premium subscription.
The MuConvert Apple Music Converter turns Apple Music songs into portable, DRM-free formats such as MP3, M4A, WAV, and FLAC for easy offline playback on any device. What’s more, it retains the original music quality and keeps ID3 tags so you can organize your music efficiently.
MuConvert Apple Music Converter Key Features and Highlights
Converts FairPlay DRM-protected Apple Music songs into portable MP3, M4A, WAV, and FLAC formats.
Retains original music quality for the ultimate offline playback experience.
Batch converts Apple songs, playlists, and albums at 20x faster speeds to save you time.
Integrates with Apple Music Webplayer so no installation of the Apple Music app or iTunes is required.
Keeps ID3 tags for easy and efficient management of your music library.
Follow these easy steps to remove DRM from Apple Music via the MuConvert Apple Music Converter:
STEP 1: Download and install the MuConvert Apple Music Converter. Click “Open the Apple Web Player” and log in to your Apple Music account using your Apple ID.

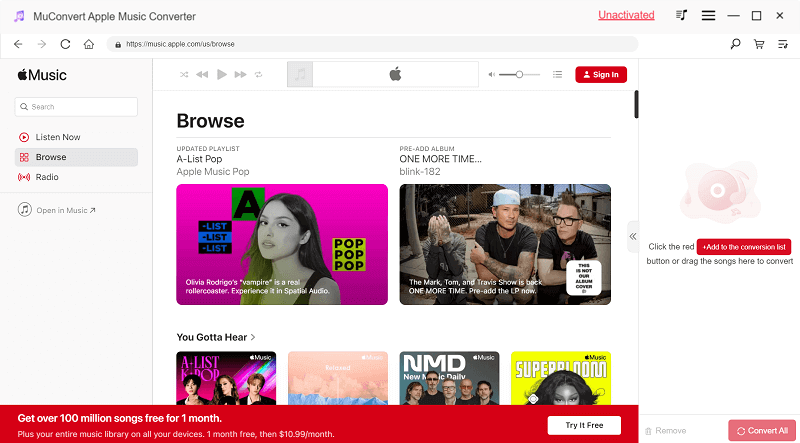
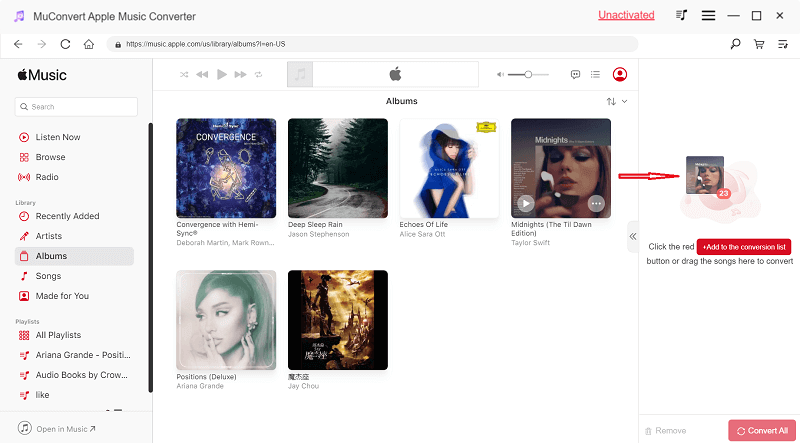
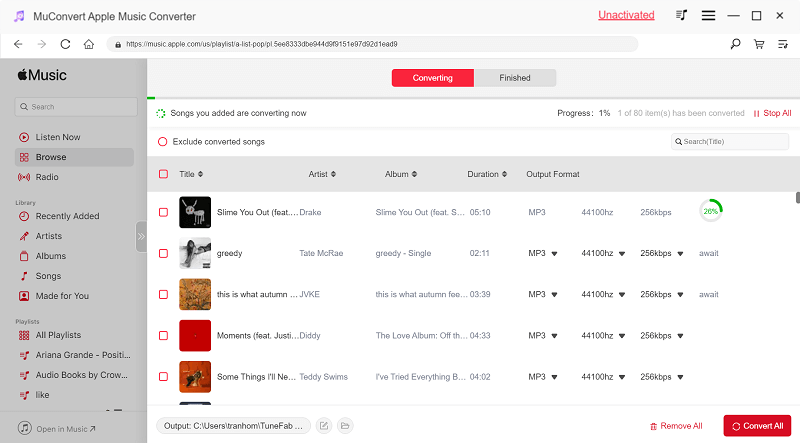
STEP 2: Use the search bar on the left panel to find the songs, playlists, and albums you want to download. Click on the red floating button when you hover your mouse over the audio items you want to download. Alternatively, drag and drop them on the right panel awaiting conversion.
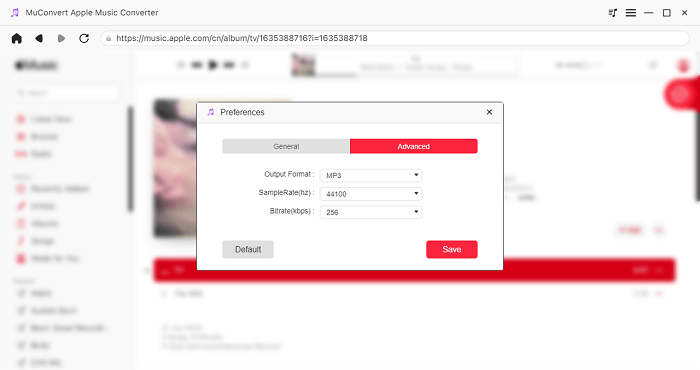
STEP 3: Click on the three lines at the top right corner of the interface. Select “Preference” to customize the general and advanced settings including the output format, bit rate, and sample rate. Select “Save” to apply these preferences to all the songs in the queue.
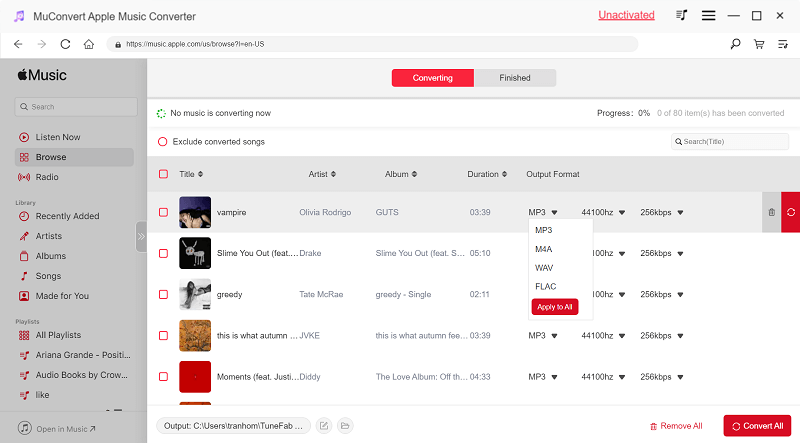
STEP 4: If you want to customize each song individually, say you want a different bit rate for a specific song, go to the song, and click the download arrow to customize the output, bit rate, or sample rate to your preference.

STEP 5: Click “Convert All” to remove Apple Music DRM. You can select individual songs or check all songs for batch conversion. After the process is complete, click the “Finished” button at the top and now you can get DRM-free Apple Music songs offline. Click the folder icon at the bottom left to navigate to the output folder on your computer.
Method 2: Get Apple Music DRM Removal via iTunes Match
Another method for Apple DRM removal is using iTunes Match, which replaces all your DRM-protected music bought from iTunes before 2009 with a DRM-free version. iTunes Match stores DRM-free songs in iCloud, allowing you to play music wherever you are using a compatible Apple device.
There are several hacks to remove DRM from Apple Music, and this is one of the easiest. Follow these steps to get Apple Music DRM removed via iTunes Match:
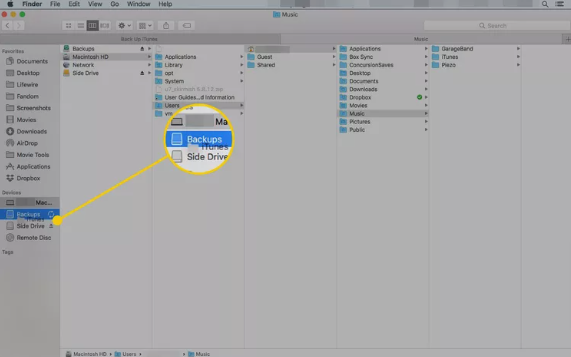
STEP 1: Find the iTunes folder in your computer’s Music folder. Drag and drop the iTunes folder to the USB or external drive to back up your music.

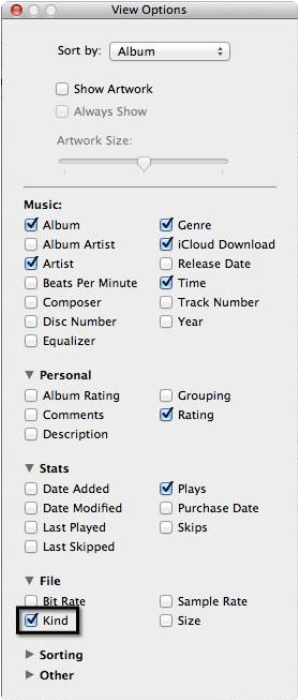
STEP 2: Find your DRM-protected songs on iTunes. The fastest way to do this is by using the Kind attribute. Turn on the Kind attribute in iTunes by hitting “View” then “Show View Options”. Scroll to the bottom to find the “File” subheading, then check the box next to “Kind.” Leave the dialog box then select “Kind” in the iTunes header to filter songs named “Protected AAC audio files,” which are DRM-protected songs.

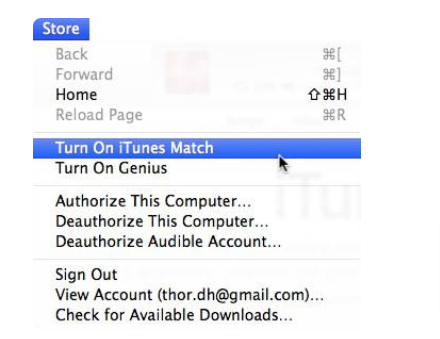
STEP 3: Turn on iTunes Match. From the iTunes menubar click “Store” then select “Turn on iTunes Match.” You will see a pop-up message confirming that an amount($) will be charged to your account. If you accept, iTunes will start replacing the DRM-protected music in your library.

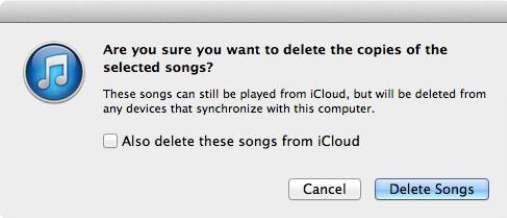
STEP 4: Delete DRM-protected songs from your iTunes library. In the “Library,” select all the songs with the “Protected AAC music” designation. An easy way to do this is by clicking the first song, holding the “Shift” button, and clicking the last song on the list. Click “Fn Delete” to remove the protected tracks from your library. Move the songs to the “Trash” and empty them for permanent removal of those files. Do not check the box that asks you to “Also delete these songs from iCloud.”

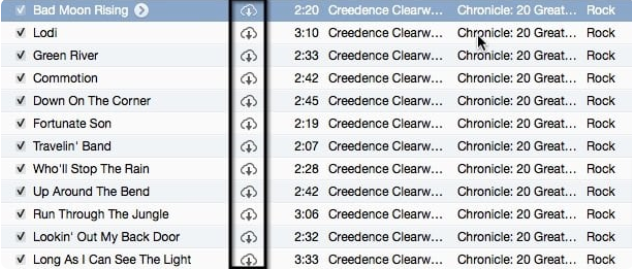
STEP 5: Re-download songs from iCloud. After iTunes Match completes the process, you will see a cloud icon next to the replaced, DRM-free songs, which you can now re-download to your iTunes library. Click the first song you want to redownload, press “Shift,” and click the last song. Finally, right-click your mouse and select “Download.” The new DRM-free songs will appear as “Purchased ACC audio files” instead of Protected audio files.

Getting Apple Music DRM removal using iTunes Match still has some restrictions. For example, even though DRM is removed, you still cannot play your favorite tracks on non-Apple devices. Only a professional music converter such as MuConvert Apple Music Converter can bypass Apple Music DRM restrictions. The best DRM removal software lets you download and play songs on Android, Windows, and Apple devices even without an Apple Music premium subscription.
Method 3: Remove DRM from Apple Music Free via Burned CD
You can remove DRM from Apple Music free. Yes, this is possible by burning the songs on a CD or DVD. But, keep in mind that the songs you “burn” still have restrictions. For example, you cannot play these songs on a non-Apple device or use them on other platforms even for personal use. Also, you can only burn Apple Music songs seven times, after which this method won’t work.
If you proceed with this method, be sure to use a CD compatible with AAC-protected songs. A normal MP3 CD/DVD is incompatible with AAC-protected files.
Follow these quick steps for Apple Music DRM removal through burned CD:
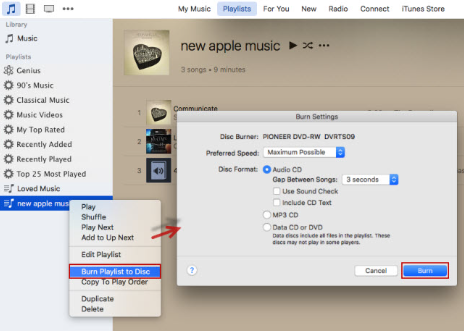
STEP 1: Open iTunes and head over to the “Music” area. Drag and drop the songs you want to burn on the left panel. Then, insert the CD or DVD into your computer’s hard drive. Right-click on the playlist, and click “Burn Playlist to Disc.” Finally, click “Audio CD” and select “Burn” to start the process.

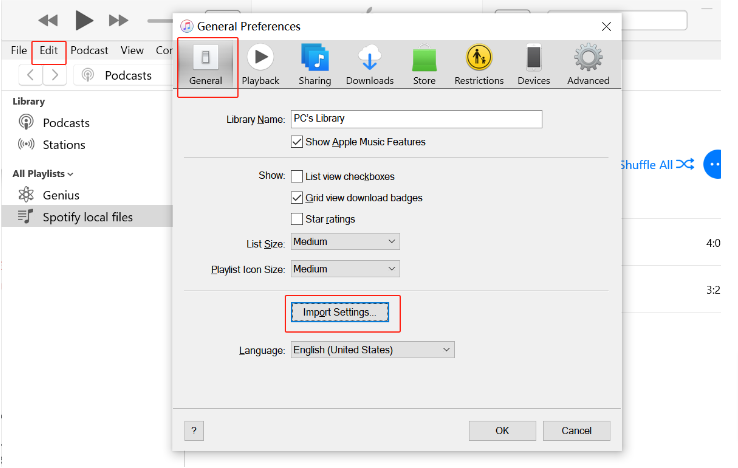
STEP 2: After the process of burning iTunes songs to CD is complete, hit “Edit”, “Preferences,” then “General,” and select “Import Settings” to transfer the songs from the CD/DVD to the computer.

Benefit From Technology In The Most Inspiring Way(Opens in a new browser tab)
Conclusion
Apple Music gives you access to millions of songs but even with a premium subscription, there are annoying limitations on how you can enjoy your favorite tracks. Due to DRM protections, offline playback is only possible on Apple devices. Also, you need an active subscription to enjoy offline listening while downloads are limited to only 10,000 songs. Luckily, with our top-recommended audio converter – MuConvert Apple Music Converter, you can remove DRM from Apple Music, download and convert unlimited songs to MP3 format, listen offline with a premium subscription, and keep your tracks forever. Try it for free now.