
Maintaining beautiful and healthy nails is an art form that combines creativity with a touch of personal care. A well-executed manicure not only enhances the beauty of your hands but also reflects your attention to detail and hygiene. To achieve this, having the proper nail kit is essential. With an array of tools and products available, knowing which items are necessary and how to use them effectively is key to a perfect manicure. Whether you’re a beginner looking to establish your routine or a seasoned nail enthusiast aiming to refine your technique, understanding best practices in nail care is crucial.
Building the ideal nail kit starts with selecting high-quality tools and products that are tailored to your specific needs. From durable nail files and cuticle pushers to the right kind of polishes and treatments, each item in your kit should serve a purpose. Using these tools correctly not only ensures the longevity of your manicure but also protects the health of your nails. It’s also important to follow application best practices to achieve a professional look, such as applying polish in thin, even layers and giving enough drying time. Additionally, post-application care is vital for maintaining the manicure’s appearance and preventing damage to your nails.
Key Takeaways
Proper selection and use of nail kit tools are fundamental for a perfect manicure.
Application techniques, including even polish coats and adequate drying time, enhance longevity.
Regular post-application maintenance safeguards nail health and manicure quality.
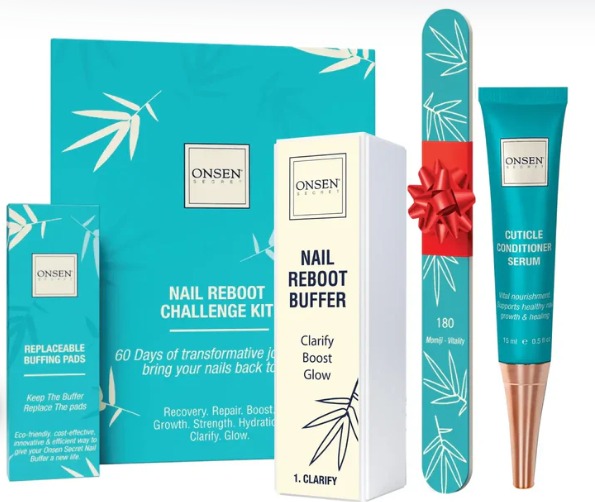
Selecting the Right Nail Kit
When starting your journey into nail care and design, choosing the right nail kit is essential. The kit you select should match your skill level and the style of manicure you wish to create.
Components for Beginners
If you’re new to nail art, a beginner-friendly nail kit is the best choice. These kits usually contain the essentials without overwhelming you with too many tools or products. A good beginner’s kit, like the Kiss Complete Salon Acrylic Kit, includes:
Acrylic bundle, powder, and liquid
Nail tips
A basic nail file
A buffer
A brush
For those interested in gel polish, look for kits that feature a UV or LED light to cure the polish. Brands like Gelish and Cooserry offer gel polish kits tailored for novices.
Professional-Grade Kits
As you develop your skills, you may want to invest in a professional-grade kit. These kits offer higher quality products and a wider range of components. Some of the top brands providing professional-level kits are Morovan and Mia Secret. Here’s what one of these kits might include:
A variety of acrylic nail powders in different colors
Monomer liquid
Professional-grade brushes
Nail primer and dehydrator
A comprehensive selection of nail tips
When stepping up to these professional kits, the quality of the included products is usually superior, allowing for a more durable and elegant finish. Remember that more advanced kits require a better understanding of nail art techniques.
Essential Tools and Products
Selecting the right tools and products is crucial for the longevity of your nail art and its health. It’s important to prioritize quality and invest in essentials that will give you professional results.
Polish and Color Quality
When choosing polish, focus on pigmentation and lasting power. High-quality polish doesn’t just look better, it often contains fewer harmful chemicals. For vibrant color and durability, opt for reputable brands. Don’t overlook the importance of a good base coat and top coat; they are the foundation and protection for your manicure.
|
Polish Type |
Purpose |
|
Base Coat |
To protect the natural nail and help color adhere |
|
Color |
Adds the aesthetic appeal to the nails |
|
Top Coat |
Provides a protective seal and shine |
Basic Manicure Tools
Your manicure kit should have the basic tools such as a nail file, cuticle pusher, cuticle trimmer, and buffers. A gentle cuticle oil or serum can keep your cuticles healthy, which is vital for strong nails.
Nail File: For shaping edges and smoothing nail tips
Buffers: To even out the nail surface before applying polish
Cuticle Pusher: To gently push back the cuticles
Cuticle Trimmer: For removing excess skin
Cuticle Oil/Serum: To moisturize the cuticles and nail bed
Advanced Nail Art Essentials
As you become more experienced, incorporate advanced products like dip powder, nail glue, foil, glitter, and rhinestones. For practice, consider using practice fingers. Nail artists often use these items to create intricate designs that make a statement.
Dip Powder: For a longer-lasting, pigmented look
Nail Glue: To securely attach decorations
Foil: Adds a metallic finish to your designs
Glitter/Rhinestones: For added sparkle and accent
Remember, the right tools and products not only improve your nail art’s appearance but also its durability and the health of your natural nails.
Application Best Practices
Proper application of a nail kit ensures long-lasting and aesthetically pleasing results. This section covers essential steps from preparing your natural nail to the final top coat application.
Preparing the Natural Nail
Before any polish is applied, ensure your nails are clean, dry, and free of oils. Clean your nails with soap and water, and then wipe them with an alcohol pad or a nail cleanser. File your nails to the desired shape, moving the file in one direction to avoid splitting. Lightly buff the surface to create a slight roughness to help the base coat adhere better. Push back your cuticles but never cut them, as this can lead to infection.
Time Allocated: 5-10 minutes
Essentials:
Nail cleanser
Nail file
Nail buffer
Applying Base and Color
Start with a thin layer of base coat to protect your natural nail and enhance polish adhesion. Allow this coat to dry for about 1-2 minutes. Apply your color polish in thin, even strokes, starting from the base of the nail and working your way up. Two coats of color usually suffice for a rich hue, waiting 1-2 minutes between coats.
Base Coat: Apply and wait for 1-2 minutes
Color Polish: Two thin coats, 1-2 minutes apart
Tips for French Tips:
Use clear or neutral polish as a base
Apply white polish to tips with precision
Finishing with Top Coats
After your final color layer has dried, apply a top coat to seal in the color and provide a natural-looking finish. This not only adds shine but also protects your manicure from chips and scratches. For a gel-like appearance, choose a gel topcoat that cures under LED or UV light.
Top Coat: Apply one coat, wait 2-3 minutes
Optional: Apply a second top coat for extra protection
Bonding: Ensure the top coat seals the edges of your nails to bond the layers together
Remember to cap the free edge of your nails with each polish layer, including the base, color, and topcoat, to further prevent chipping.
Post-Application Care and Maintenance
After applying your nail polish or gel manicure, it’s crucial to give your nails proper attention to ensure longevity and maintain their pristine condition. The following will guide you through routine upkeep and the safe removal of nail products.
Routine Upkeep
Hydration is key: Daily use of cuticle oil can extend the life of your manicure. Apply a small amount around the base of your nails to keep your cuticles hydrated and healthy. Incorporate a nourishing hand cream into your regimen to moisturize your skin and nails. Ensure you allow for sufficient drying time post-application to prevent smudging or denting your fresh manicure.
Minimize Exposure: To prevent chipping, wear gloves when cleaning or doing dishes. Limit contact with harsh chemicals that can break down nail polish or gel.
Touch-ups: If a chip occurs, apply a small amount of the same color nail polish to patch it up. Allow it to dry completely.
Tip: For a DIY solution, mix sugar and olive oil to create a gentle scrub for exfoliating your hands once a week. This will keep your hands smooth and prep them for hydration.
Safe Product Removal
When it’s time to remove your nail polish or gel, the process should be as gentle as possible to prevent damage to your nails.
Nail Polish: Use a non-acetone polish remover. Apply it to a cotton ball and press it onto the nail for a few seconds, then wipe away the color with gentle strokes.
Gel Manicure: Soak a cotton ball in acetone-based remover, place it directly on the nail, and wrap with foil for up to 15 minutes. The gel should lift away with ease, minimizing scraping and peeling.
Be Patient: Rushing the removal process can harm your nail bed and cuticles, costing you more
money for repair treatments.
Brands such as Sally Hansen offer specialized removers that can combine the effectiveness of a quick drying time and ease of removal, all while keeping your nails’ health in mind.
Frequently Asked Questions
Before diving into your nail kit, it’s essential to have a clear understanding of the process to ensure a successful manicure. Proper preparation, tool selection, and application technique can significantly influence the outcome.
What are the essential steps for prepping nails before applying a gel or acrylic kit?
Clean your nails thoroughly using a gentle nail cleanser. Push back the cuticles and buff the surface of your nails to create a rough texture for better adhesion. Ensure your nails are dry and free of any oils or residue before applying the base coat.
What factors should be considered when choosing a nail kit for a beginner?
Select a nail kit that includes comprehensive instructions and essential tools like a file, buffer, and cuticle stick. Kits with fewer steps and clear, simple instructions are better suited for beginners.
How can you ensure the longevity of a manicure done with an at-home gel nail kit?
After application, ensure all edges of your nails are sealed with a top coat to prevent chipping. Avoid exposure to harsh chemicals and use gloves when cleaning to extend the life of your manicure.
What safety measures should be taken when using a UV light with a gel nail kit?
Always follow the manufacturer’s instructions when using UV light. Protect your skin by applying sunscreen to your hands or using fingerless gloves, and avoid looking directly at the UV light.
What are the differences between gel and dip powder nail kits in terms of application and wear?
Gel kits require curing under a UV light, providing a glossy finish and flexible wear. Dip powder kits involve layering powder and activator, which results in a matte finish and may last longer than traditional gel.
Tips to Have Safe Travelling With Dog(Opens in a new browser tab)
How do professionals achieve a flawless finish with gel nail kits?
Professionals meticulously clean and prep nails, apply thin layers of polish, and cure each layer under UV light as recommended. They pay attention to the cuticle area and the tips of the nails, ensuring crisp and clean edges.